Air Compressor Drain Valve Extension
Disclosure: This post may contain affiliate links, meaning if you decide to make a purchase via my links, I may earn a commission at no additional cost to you. See my disclosure for more info.
If you own an air compressor then you will know that as part of your maintenance routine you periodically drain the water from the air tank. While this is an easy task to perform the harder part can be accessing the drain value.
Manufacturers like to place the drain valve at the lowest part of the air tank which means in most cases underneath, while this is great for draining water it often means you have to tilt or lift the air compressor to access the valve. This is where an air compressor drain valve extension can come in really handy.
The Air Compressor Drain Valve Extension allows you to extend the reach of the drain valve on an air compressor tank, allowing for easier maintenance and draining of the tank.
If adding an air compressor drain valve extension to your air compressor sounds like a great idea, then you have several options. You could go out and buy one in kit form, and if you are not big on DIY then thats fine and i will give you links to some kits at the end of this article. But if you like a DIY project then you should be able to tackle this job easily in a week end and possibly from parts you already have. So lets jump right in and get started.
Table of contents
What You Will Need
- Screwdriver
- Pliers
- Adjustable wrench
- Small pipe wrenches
- Pipe thread compound or white PTFE Teflon tape
- Ball valve
- Short Nipple
- 90° Street elbow
If you don't have these items on hand you should be able to pick them up from you local hardware store.
To determine the length of the nipple you will need to measure from the drain valve position to the edge of the compressor where you would like to locate your valve. The idea is to bring the drain valve out more from the underbelly of the air compressor.
The most common thread for compressor valves is 1⁄4 inch. NPT, but remove the valve and check your fitting before heading to the store.
How to Make an Air Compressor Drain Valve Extension
1. Drain the Compressor
Before you can start playing around with the compressor drain valve, it is crucial to drain it first. You can let it fully drain before you can start the repairs.
To help you with faster working on the air compressor, simply tip it onto the side so that you have easier access to the drain valve. With the compressor on its belly, it would hard to reach the drain valve and easily swap it out.
2. Removing the Drain Valve

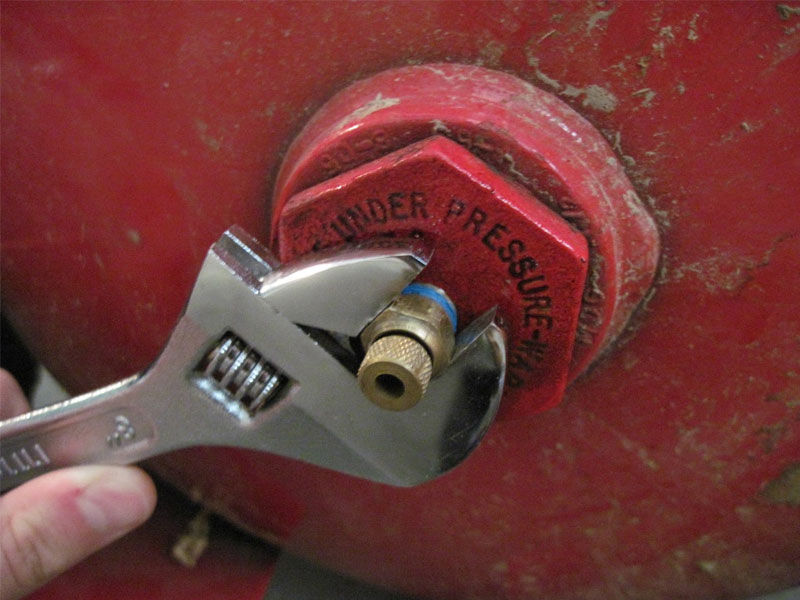
The drain valves are commonly threaded into the compressor with the provision of an adapter. You will need the right tools to remove it from the adapter socket. This calls for using the adjustable wrench for unscrewing the drain valve. It might be tight at first, but with an additional force, the drain valve should easily come out with ease.
3. Test Fit Your Pipe Fittings
Before we start applying any compounds or thread tape it is a good idea to have a test run just to make sure you are happy with everything.
Start by making sure that your street elbow screws into the drain valve adapter, next screw in the nipple and make sure you nipple reaches to where you would like your new valve to be. Screw the valve on the the nipple and make sure you have easy access the to the valve and that there is nothing interfering with the valve from opening and closing.
Finally and most importantly place your compressor in the up right working position and make sure that you have clearance under your new drain vale extension. The last thing that is needed is that it hits the floor and the doesn't allow tha compressor to work properly.
4. Fitting the Pipe Fittings

If our test run when according to plan then it is time to proceed by applying some thread compound to the threads of the elbow pipe before fitting it, alternatively if you are using white PTFE tape, also called Teflon tape, wrap two layers of tape around the threads. To prevent the tape from pulling up during threading wind the tape clockwise direction.
The work of such a compound or tape is to help create a better seal for the air compressor. Insert the street elbow into the adapter and tighten it using a small pipe wrench.
Next is to have the nipple with the female threads inserted, apply sealant to the threads and screw into place.
5. Screw the Ball Valve

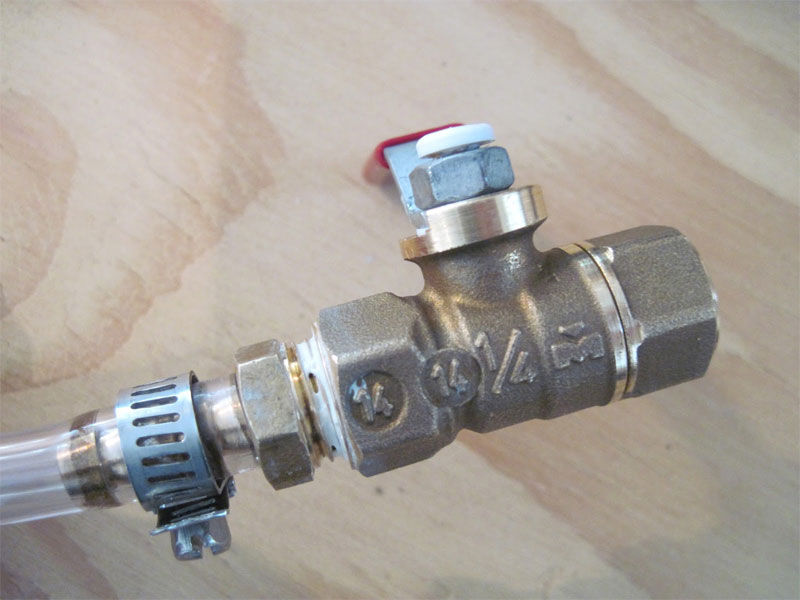
It is now time to install the ball valve on the nipple pipe. It is as simple as screwing the ball valve on the nipple and you are good to go.
As part of finishing up, you can install another smaller nipple pipe into the ball valve. This would allow you to attach some hose pipe for drainage. By now, you should be done with the whole installation process of the better and improved drain valve.
6. Testing
Before we can completely claim success, it is important that you get to test the valve first. The testing will involve checking out if the valve can hold the air pressure and release it whenever needed. This would involve generating the air and testing out the new valve. If you followed the steps correctly, then it should work fine.
Final Thoughts
Hopefully you have enjoyed this little DIY air compressor drain valve extension project and are happy with the results. You will now be able to easily drain The air compressor when ever you want to.
Remember that air in the compressor could be under high pressure, so take precautions when draining it and keep the valve facing away from you so as to prevent any debris from getting into your face.
We always recommend using eye protection when around compressed air, accidents can happen and no one wants a serious injury.
Drain Valve Extension Kits
As promised earlier here are some ready to go air compressor drain valve extension kits that you can fit to your compressor, just remember to check the size of the fitting in your drain valve adaptor before you order so as to ensure you purchase the correct one for your air compressor.

Kit Includes:
- Air Inlet: 1/4 in. NPT.
- Hoes Length: 10 Inch.
- Hose Material: Braided Steel.
- End Size: 1/4” Male Threads.
- There is a Hex bushing brass adapter which is 3/8" Male x 1/4" Female for connecting two pipes or with different diameters.
- This 1/4 in. ball valve made of chrome-plated brass.
- Working Pressure: 175 PSI .
- Blasting Pressure: 475 PSI.
- Max Temperature: 200 ℉.
More Resources
We hope you found our article helpful, if you would like to read some more of our articles then we think these below may be interesting for you.
